- First of all, we need a SharePoint list. Below is the list, I had created. It has 8 columns.
- Now, the objective is that I wish to export any combination of columns-
- ID, Title, First Name, Last Name
- ID, First Name, Date Of Joining, Salary, Designation
- ID, Full Name (First Name + Last Name), Designation
- As we can see in above examples, the number of column as well as the columns itself are not fixed. Till now, we were creating a defined template which is having a table with columns and using it to export the data. This approach will not work here.
- Microsoft had given solution for this problem as well. Let's begin-
- Create a document library in Site Assets or the Documents library. Let say "ExcelFiles".
- Now create a blank excel file and save it with name "EmployeesData.xlsx".
- Upload this file in "ExcelFiles" folder.
- Now, open the Power Automate maker portal and create a new Instant cloud flow with flow name as "POC-ExportExcelDynamic" and trigger condition "PowerApps".
- Add a variable that will interact with PowerApps to get the column names.
- Save the flow and keep saving the flow at regular interval during the flow writing.
- Now, to create the table in excel dynamically, we should know the number of columns that are going to be created and based upon the count, the Excel cell address. As we know, that excel works upon cell address. Columns are defined as A, B, C, .... while rows are defined as 1, 2, 3, ...
- So, for the first row the first cell address is A1, second cell address is B1 and so on.
- Similarly, for the second row the first cell address is A2, second cell address is B2 and so on.
- Similarly, table is also dependent upon cells. For a 3 column table, the header address will be A1 -> C1. For a 4 column table, it will be A1 -> D1.
- However, there is no direct method to get the respective address of cell using the count. Here, we have to apply some trick. We will use an excel file to get the series of the address based upon count. Excel has provided "ADDRESS" function. Here is the excel.
- We have to create a JSON and will use the same. Here is the JSON.
[ { "ColumnNo": 1, "ColumnAddress": "A1" }, { "ColumnNo": 2, "ColumnAddress": "B1" }, { "ColumnNo": 3, "ColumnAddress": "C1" }, { "ColumnNo": 4, "ColumnAddress": "D1" }, { "ColumnNo": 5, "ColumnAddress": "E1" }, { "ColumnNo": 6, "ColumnAddress": "F1" }, { "ColumnNo": 7, "ColumnAddress": "G1" }, { "ColumnNo": 8, "ColumnAddress": "H1" }, { "ColumnNo": 9, "ColumnAddress": "I1" }, { "ColumnNo": 10, "ColumnAddress": "J1" }, { "ColumnNo": 11, "ColumnAddress": "K1" }, { "ColumnNo": 12, "ColumnAddress": "L1" }, { "ColumnNo": 13, "ColumnAddress": "M1" }, { "ColumnNo": 14, "ColumnAddress": "N1" }, { "ColumnNo": 15, "ColumnAddress": "O1" }, { "ColumnNo": 16, "ColumnAddress": "P1" }, { "ColumnNo": 17, "ColumnAddress": "Q1" }, { "ColumnNo": 18, "ColumnAddress": "R1" }, { "ColumnNo": 19, "ColumnAddress": "S1" }, { "ColumnNo": 20, "ColumnAddress": "T1" }, { "ColumnNo": 21, "ColumnAddress": "U1" }, { "ColumnNo": 22, "ColumnAddress": "V1" }, { "ColumnNo": 23, "ColumnAddress": "W1" }, { "ColumnNo": 24, "ColumnAddress": "X1" }, { "ColumnNo": 25, "ColumnAddress": "Y1" }, { "ColumnNo": 26, "ColumnAddress": "Z1" }, { "ColumnNo": 27, "ColumnAddress": "AA1" }, { "ColumnNo": 28, "ColumnAddress": "AB1" } ]
- You may create as many as column numbers you want. Ideally, keep it "Total Number of Columns in list + 10" so that in case, if one or 2 columns got added later on in the list, it will not impact your flow.
- Now, add an action called Parse JSON in flow and paste this JSON in Content as well as use this JSN to create schema "Generate from sample".
- Now, we have the columns list that were passed through PowerApps and we have the mapping structure of Column Number vs Cell Address.
- Add another action called "Filter array".
- Here we will filter the JSON to find the corresponding cell address row (Column Address property in JSON) using the count of columns passed through PowerApps.
- It will give us the item which is having ColumnNo property equals to the total number of columns received from PowerApps.
- Now, we will fetch the ColumnAddress property from this output. So, add another called "Compose".
- The first part is completed. Now, add an action called "Copy file". We will create a copy of the excel template.
- Remember to select "Copy with a new name" option in dropdown which is asking the further course of action "If another file is already there".
- Now, here the climax part of the flow. Microsoft have given a unique feature to create table on the fly. Add an action "Create table".
- Provide the input as shown below. The starting range is fixed to A1, followed by a colon ":". The table range can be "Absolute", "Partial Relative" or "Relative". Make sure, whatever you are choosing, both cell address must be in same format. Here, I had chosen, "Relative"
- You may give the table name as per your wish. I had given "SearchResults". You may define a variable for the Table Name as well in the beginning because, this table name is going to be used at two places, therefore, to avoid any misspell, you may use variable.
- This was the second part.
- The last part is adding items to table.
- Add an action called "Get Items".
- Next, we will use the "Select" to transform the data as per our requirement. For an example, if we wish to add another column "Full Name", we can do here by using "concat" function. Remember, the name of column at left side in mapping must be exactly the same as we are expecting to get receive from PowerApps.
- So, add "Select" action.
- I had used "concat" function to join First Name & Last Name. Also, I used "formatDateTime" function to apply formating upon Date Of Joining.
- Now, use "Apply to each" action to add this data to excel table.
- Add an action "Apply to each".
- Now, add "Add row into a table" action inside this "Apply to each" action.
- It's all done.
- Now, If you wish to send this excel as attachment or send the link of the file, you can add further actions that will fulfil the requirements. These all, we have already discussed in our previous posts.
- Save the flow and test it.
- Let's check for our first set of columns mentioned in the beginning of the post. Remember, column names should be separated either by comma or semicolon and should not have leading or trailing spaces.
- ID,Title,First Name,Last Name [Correct Format]
- ID;Title;First Name;Last Name [Correct Format]
- ID, Title,First Name , Last Name [In-Correct Format]
- Click on "Test" >> "Manually" >> "Test". It will show the Run window and asking for Column names.
- Give the input as "ID,Title,First Name,Last Name" and click on Run.
- Wait for the flow to complete it's execution. It got succeeded.
- Check the SharePoint library. The file got created with name as "EmployeesData1.xlsx".
- Here we go. The is there.
- Now let's try with custom column
- ID,Full Name,Designation,Date Of Joining,Salary,Experience
- Here we go. This also tested successfully.
- This is how, you can create Excel Tables dynamically with any number of columns. However, you can create the file on the runtime but for that, you need to include the OneDrive connection. Ultimately, you are creating a file then copying it. Means one more step. Therefore, we avoided that. Keeping a blank file is far better than to include one more connection and adding one more step.
Friday, September 23, 2022
Power Automate: Export To Excel With Dynamic Table & Columns Creation
Tuesday, February 1, 2022
PowerApps: Patch Create n Update
Hello Friends,
Welcome back with another post. Today, we will discuss about Patch function in PowerApps. Patch function is used to create as well update a record in data source. It returns the object of the record it has created or updated.
So, the scenario is- "Sometimes, we have a mix of existing records as well as new records (yet to create in data source) in collection. Now, we want to update the existing records while if the record is not available, then we need to create that record.". Let's see, how we can achieve this-
- I have a simple list named "PatchCommandList" having 2 columns Title & LName.
- Right now, it is empty.
- Now, we will create a PowerApps app named "PatchCommandApp".
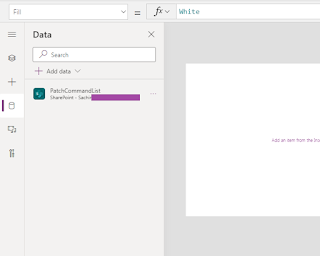
- Add SharePoint data source connection and add that list in PowerApps.
- Now add a button and write below function on it's OnSelect property.
If( IsBlankOrError( Patch( PatchCommandList, First( Filter( PatchCommandList, Title = "Sachin" ) ), {LName: "Jain"} ) ), Patch( PatchCommandList, Defaults(PatchCommandList), { Title: "Sachin", LName: "Jain" } ) )
- What this code will perform is that, it will first execute a Patch update command and check if the result is blank or any error occurred. If YES, then it means that the record we are going to update doesn't exists, therefore, it will execute another Patch command which will insert the record.
- Now play the app and press the button. You will be surprised, that the record get inserted.
- Now, I will change the LName in update section.
- Once, again, play the app and press the button. Now, it should update the existing record. Let's see the output.
- Wow!, It updated the record.
- So, this way, you can use Patch function in this way when you are in dilemma and not sure which record to update and which to insert.
Monday, January 31, 2022
Dynamics 365: CRUD Operations-6 (Delete Item)
Hello Friends,
Welcome back with another post on Dynamics 365. This post is the 6th part of CRUD operations.
In last post, we have created an item in Account Entity.
Dynamics 365: CRUD Operations-1 (Basic Preparations)
Dynamics 365: CRUD Operations-2 (Retrieve All Items)
Dynamics 365: CRUD Operations-3 (Create Item)
Dynamics 365: CRUD Operations-4 (Read Item)
Dynamics 365: CRUD Operations-5 (Update Item)
Now, we will learn about how to delete an individual item from D365 >> Account entity.
- Below is the complete HTML. This HTML includes code of previous post as well. You may copy/paste this entire HTML.
<html> <head></head> <body onfocusout="parent.setEmailRange();" style="overflow-wrap: break-word;"> <meta charset="UTF-8"> <link rel="stylesheet" href="https://static2.sharepointonline.com/files/fabric/office-ui-fabric-js/1.4.0/css/fabric.min.css"> <link rel="stylesheet" href="https://static2.sharepointonline.com/files/fabric/office-ui-fabric-js/1.4.0/css/fabric.components.min.css"> <link rel="stylesheet" href="https://stackpath.bootstrapcdn.com/bootstrap/4.3.1/css/bootstrap.min.css" integrity="sha384-ggOyR0iXCbMQv3Xipma34MD+dH/1fQ784/j6cY/iJTQUOhcWr7x9JvoRxT2MZw1T" crossorigin="anonymous"> <link href="https://unpkg.com/bootstrap-table@1.18.1/dist/bootstrap-table.min.css" rel="stylesheet"> <script src="https://static2.sharepointonline.com/files/fabric/office-ui-fabric-js/1.4.0/js/fabric.min.js"></script> <script src="https://ajax.googleapis.com/ajax/libs/jquery/3.2.1/jquery.min.js"></script> <script src="https://code.jquery.com/jquery-3.3.1.slim.min.js" integrity="sha384-q8i/X+965DzO0rT7abK41JStQIAqVgRVzpbzo5smXKp4YfRvH+8abtTE1Pi6jizo" crossorigin="anonymous"></script> <script src="https://cdnjs.cloudflare.com/ajax/libs/popper.js/1.14.7/umd/popper.min.js" integrity="sha384-UO2eT0CpHqdSJQ6hJty5KVphtPhzWj9WO1clHTMGa3JDZwrnQq4sF86dIHNDz0W1" crossorigin="anonymous"></script> <script src="https://stackpath.bootstrapcdn.com/bootstrap/4.3.1/js/bootstrap.min.js" integrity="sha384-JjSmVgyd0p3pXB1rRibZUAYoIIy6OrQ6VrjIEaFf/nJGzIxFDsf4x0xIM+B07jRM" crossorigin="anonymous"></script> <script src="https://code.jquery.com/jquery-3.3.1.slim.min.js" integrity="sha384-q8i/X+965DzO0rT7abK41JStQIAqVgRVzpbzo5smXKp4YfRvH+8abtTE1Pi6jizo" crossorigin="anonymous"></script> <script src="https://cdnjs.cloudflare.com/ajax/libs/popper.js/1.14.7/umd/popper.min.js" integrity="sha384-UO2eT0CpHqdSJQ6hJty5KVphtPhzWj9WO1clHTMGa3JDZwrnQq4sF86dIHNDz0W1" crossorigin="anonymous"></script> <script src="https://stackpath.bootstrapcdn.com/bootstrap/4.3.1/js/bootstrap.min.js" integrity="sha384-JjSmVgyd0p3pXB1rRibZUAYoIIy6OrQ6VrjIEaFf/nJGzIxFDsf4x0xIM+B07jRM" crossorigin="anonymous"></script> <script src="https://unpkg.com/bootstrap-table@1.16.0/dist/bootstrap-table.min.js"></script> <script src="https://unpkg.com/tableexport.jquery.plugin/tableExport.min.js"></script> <style type="text/css"> .footer { position: fixed; bottom: 0; right: 0; padding-bottom: 10px; padding-right: 10px; } .footerButton { width: 150px; } </style> <div> <table id="tblCreateRecord" style="width: 100%;"> <tr> <td style="width: 50%;">Account Name</td> <td style="width: 5%;">:</td> <td style="width: 45%;"><input type="text" id="txtAccountName"></td> </tr> <tr> <td style="width: 50%;">Primary Contact Person (ID)</td> <td style="width: 5%;">:</td> <td style="width: 45%;"><input type="text" id="txtPrimaryContactPersonID"></td> </tr> <tr> <td style="width: 50%;">Account Category Code (Preferred Customer-1 / Standard-2)</td> <td style="width: 5%;">:</td> <td style="width: 45%;"><input type="text" id="txtAccountCategoryCode"></td> </tr> <tr> <td style="width: 50%;">Annual Revenue</td> <td style="width: 5%;">:</td> <td style="width: 45%;"><input type="text" id="txtAnnualRevenue"></td> </tr> <tr> <td style="width: 50%;">Primary Phone</td> <td style="width: 5%;">:</td> <td style="width: 45%;"><input type="text" id="txtPrimaryPhone"></td> </tr> <tr> <td colspan="3"> <input type="button" onclick="fnCreateRecord();return false;" value="Create Record"/> <input type="button" onclick="fnUpdateRecord();return false;" value="Update Record"/> <input type="button" onclick="fnDeleteRecord();return false;" value="Delete Record"/> </td> </tr> </table> </div> <div> <table id="table" data-search="true" data-header-style="headerStyle" data-page-size="25"> <thead> <tr> <th data-field="id" data-visible="false" data-checkbox="true">Id</th> <th data-field="name" data-sortable="true">Full Name</th> <th data-field="mainphone" data-sortable="true">Main Phone</th> <th data-field="primaryemail" data-sortable="true">EMail (Primary)</th> <th data-field="primarycontact" data-sortable="true">Primary Contact</th> <th data-field="primarycontactname" data-sortable="true">Primary Contact Name</th> <th data-field="readitem" data-sortable="false">Read</th> </tr> </thead> </table> </div> </body> <script type="text/javascript"> var vrAccountID = 0; $(document).ready(function(){ fnGetAllAccounts(); }); function fnGetAllAccounts() { //var query = '?$select=accountcategorycode,address1_addressid,address1_longitude,donotphone,name,_primarycontactid_value,revenue'; var query = '?$select=accountid,name,telephone1,emailaddress1,_primarycontactid_value'; window.parent.Xrm.WebApi.online.retrieveMultipleRecords("account", query).then( function success(accounts) { var results = accounts.entities; var accountRecords = []; results.forEach(function (result, index, array) { var accountid = result["accountid"]; var name = result["name"]; var telephone = result["telephone1"]; var emailaddress = result["emailaddress1"]; var primarycontactid = result["_primarycontactid_value"]; var primarycontactname = result["_primarycontactid_value@OData.Community.Display.V1.FormattedValue"]; var accountRecord = {}; accountRecord = { 'id': accountid, 'name': name, 'account': accountid, 'mainphone': telephone, 'primaryemail':emailaddress, 'primarycontact':primarycontactid, 'primarycontactname':primarycontactname, 'readitem':'<a href="javascript:void(0);" onclick="fnReadRecord(\'' + accountid + '\');return false;">Read</a>' } accountRecords.push(accountRecord); }); $('#table').bootstrapTable({ data: accountRecords }); }, function (error) { console.log(error.message); reject(Error(error.message)); }); } function fnCreateRecord() { var entityData = { "name": $('#txtAccountName').val(), "primarycontactid@odata.bind": "/contacts(" + $('#txtPrimaryContactPersonID').val() + ")", //--- Lookup --- Display Text = Primary Contact "accountcategorycode": $('#txtAccountCategoryCode').val(), // Option Set --- Display Text = Category "revenue": parseFloat($('#txtAnnualRevenue').val()), // Currency (money type) ---Display Text = Annual Revenue "telephone1":$('#txtPrimaryPhone').val() } window.parent.Xrm.WebApi.createRecord("account", entityData).then( function success(result) { //Success - No Return Data alert("Account created successfully."); }, function (error) { alert(error.message); } ); } function fnReadRecord(accountID) { vrAccountID = accountID; //var query = '?$select=accountcategorycode,address1_addressid,address1_longitude,donotphone,name,_primarycontactid_value,revenue'; var query = '?$select=accountid,name,accountcategorycode,revenue,telephone1,_primarycontactid_value'; window.parent.Xrm.WebApi.online.retrieveRecord("account",accountID, query).then( function success(result) {debugger; if(result != null) { $('#txtAccountName').val(result["name"]); $('#txtPrimaryContactPersonID').val(result["_primarycontactid_value"]); $('#txtAccountCategoryCode').val(result["accountcategorycode"]); $('#txtAnnualRevenue').val(result["revenue"]); $('#txtPrimaryPhone').val(result["telephone1"]); } }, function (error) { console.log(error.message); reject(Error(error.message)); }); } function fnUpdateRecord() { var entityData = { "name": $('#txtAccountName').val(), "primarycontactid@odata.bind": "/contacts(" + $('#txtPrimaryContactPersonID').val() + ")", //--- Lookup --- Display Text = Primary Contact "accountcategorycode": $('#txtAccountCategoryCode').val(), // Option Set --- Display Text = Category "revenue": parseFloat($('#txtAnnualRevenue').val()), // Currency (money type) ---Display Text = Annual Revenue "telephone1":$('#txtPrimaryPhone').val() } window.parent.Xrm.WebApi.updateRecord("account", vrAccountID, entityData).then( function success(result) { alert("Account updated successfully."); }, function (error) { // handle error conditions console.log(error.message); reject(error.message); } ); } function fnDeleteRecord() { window.parent.Xrm.WebApi.deleteRecord("account", vrAccountID).then( function success(result) { alert("Account deleted successfully."); }, function (error) { console.log(error.message); // handle error conditions } ); } </script> </html>
You need to copy/paste this HTML in Web Resource file we discussed in previous post.Save the Web Resource file and then publish it. Now refresh the D365 page (Ctrl + F5).
Now, check it.First load the page and click on Read button for any record, you wish to delete.- Now, click on Delete Record button. It will delete the record and prompts the message.
- Now, refresh the page or open the Account entity list form.
- The entity record has been deleted.
- This way, you can delete the individual record itself.
- The API used is:-
- window.parent.Xrm.WebApi.deleteRecord
- With this post, this series comes to an end. This is how, you can perform CRUD operations in D365.