According to microsoft-
The SharePoint Framework (SPFx) is a page and web part model that provides full support for client-side SharePoint development, easy integration with SharePoint data, and extending Microsoft Teams. With the SharePoint Framework, you can use modern web technologies and tools in your preferred development environment to build productive experiences and apps that are responsive and mobile-ready.
Key features of the SharePoint Framework include:
- It runs in the context of the current user and connection in the browser. There are no iFrames for the customization (JavaScript is embedded directly to the page).
- The controls are rendered in the normal page DOM.
- The controls are responsive and accessible by nature.
- It enables the developer to access the lifecycle in addition to render, load, serialize and de-serialize, configuration changes, and more.
- It's framework-agnostic. You can use any JavaScript framework that you like including, but not limited to, React, Handlebars, Knockout, Angular, and Vue.js.
- The developer toolchain is based on popular open-source client development tools such as NPM, TypeScript, Yeoman, webpack, and gulp.
- Performance is reliable.
- End users can use SPFx client-side solutions that are approved by the tenant administrators (or their delegates) on all sites, including self-service team, group, or personal sites.
- SPFx web parts can be added to both classic and modern pages.
- SPFx solutions can be used to extend Microsoft Teams.
Now, let us see, how we can create SPFx webpart. Before creating SPFx webpart, there are some pre-requisites that need to fulfill. Please refer SPFx Prerequisites page.
Let's begin-
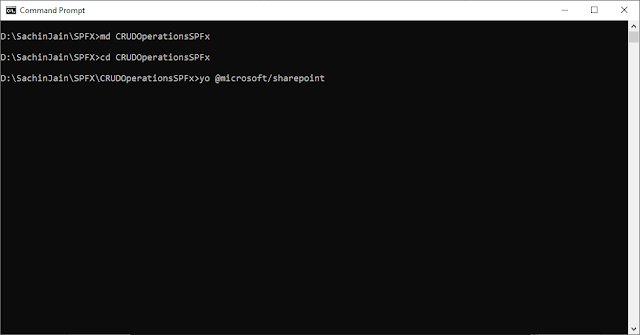
- Open command prompt and move to the folder where you need to create SPFx solution. I am creating SPFx solution in D drive.

- Now create a folder where SPFx solution files will be created using command "md CRUDOperationsSPFx". You make choose any name as per your wish. "md" is the DOS command to create directory/folder.
- Change the directory path using command "cd CRUDOperationsSPFx". "cd" is the DOS command to change the directory/folder.

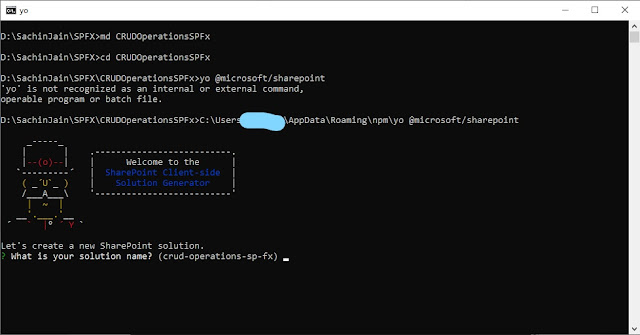
- Execute the command "yo @microsoft/sharepoint". It runs Yeoman SharePoint Generator to create a new SPFx web part.
- Sometimes, it happens that when we had installed all the pre requisites, it doesn't gets installed globally. In that case, it fails to recognize the command. In such case, find out the path where all the installations took place. Copy the complete path and paste it before "yo". Press Enter

- Now, it will ask a series of questions ( name can be of your choice 😊 ) -
- What is your solution name? : CRUDOperationsBySPFxSolution

- Which baseline packages do you want to target for your component(s)? : SharePoint Online only (latest)

- Where do you want to place the files? : Use the current folder

- Do you want to allow the tenant admin the choice of being able to deploy the solution to all sites immediately without running any feature deployment or adding apps in sites? : N


- Will the components in the solution require permissions to access web APIs that are unique and not shared with other components in the tenant? : N


- Which type of client-side component to create? : WebPart

- Apart form it, now it will ask the next set of questions that are specific about your web part ( name/description can be of your choice 😊 ) -
- What is your Web part name? : CRUDOperationsBySPFxWebPart

- What is your Web part description? : Manage CRUD Operations Using SPFx

- Which framework would you like to use? : No JavaScript framework

- Once you press Enter, it will start creating the SPFx webpart. It may take from 2-3 minutes to 20-25 minutes.

- Once completed, a Congratulations! message will be displayed on screen.

- Finally, WebPart has been created successfully. Now you may view it on local workbench, how it is looking. But we are stopping here as we have to modify it as per our need. Hence we will open the code in Visual Studio Code Editor. For this we will use "code ." command.

- Press Enter. It will open the SPFx webpart code is VSC editor.

- Coming back to command prompt window, we will use another command to see how the default WebPart looks like. For this we will use "gulp serve" command. In case of path issue, use the complete path

- This command executes a series of gulp tasks to create and start a local webserver hosting the endpoints localhost:4321 and localhost:5432. It will then open your default browser and load the workbench preview web parts from your local dev environment.

- 😟 Where is my webpart?
- Relax! Click on the + sign showing at the middle. It will populate the available webpart.

- Here is our webpart. Click on it. It will be added to the local workbench.

- Now, open your Sharepoint online site. change the root URL by removing the SitePages/<YourDefaultPage>.aspx by "_layouts/15/workbench.aspx" (https://yoursitename.sharepoint.com/sites/yoursubsitename/_layouts/15/workbench.aspx) and press Enter. (Remember WorkBench is available only in Online Site. It is not available in SharePoint 2016/2013...).

- This is your SharePoint site workbench. Now click on + sign at the middle. Surprisingly, It will show your webpart along with others.

- Click on it. It will be added to the SharePoint site workbench.

- Till now, we were creating our default SPFx webpart. Now we have to modify it so that we can try CRUD operations using it. For this, first we need a SharePoint list. I am using a simple list with 4 columns-
- Title : (or Full Name) of type Single Line of Text
- Address : of type Single Line of Text
- Mobile : of type Single Line of Text
- EmailID : of type Single Line of Text

- Fine. Till now you have done good job. Now, come to the code part. Remember, we had opened our SPFx webpart code in code editor using "code ." command.
- In Explorer window on left side, traverse down to "\src\webparts\crudOperationsBySpFxWebPart" and open "CrudOperationsBySpFxWebPartWebPart.ts" file.

- Look for the code line-
- import { escape } from '@microsoft/sp-lodash-subset';
- Add below line in next line (see line no.8 in below screenshot). SPHttpClient and SPHttpClientResponse will be used for REST API calls for CRUD operations.
- import { SPHttpClient, SPHttpClientResponse } from'@microsoft/sp-http';

- Next look for below code-
- export interface IAzureWebApiWebPartWebPartProps {description: string;}
- Add below interface just after it-
- interface IRegistrationDetails{Title:string;Address:string;Mobile:string;EmailID:string;Id:Int32Array;}
- The code will appear as below-

- Let's replace the default content view of webpart with some controls and a grid. Check the below line-
- export default class CrudOperationsBySpFxWebPartWebPart extends BaseClientSideWebPart<ICrudOperationsBySpFxWebPartWebPartProps> {
- Let's replace the highlighted content shown as below with the given next-

- Replace with below code-
- private Listname: string = "Registration Details";private listItemId: number = 0;public render(): void {this.domElement.innerHTML = `<div><table><tr><td>Full Name</td><td><input type="text" id="idFullName" name="fullName" placeholder="Full Name.."></td></tr><tr><td>Address</td><td><input type="text" id="idAddress" name="address" placeholder="Address.."></td></tr><tr><td>Mobile Number</td><td><input type="text" id="idPhoneNumber" name="mobile" placeholder="Mobile Number.."></td></tr><tr><td>Email ID</td><td><input type="text" id="idEmailId" name="emailid" placeholder="Email ID.."></td></tr></table><table><tr><td><button class="${styles.button} find-Button">Find</button><button class="${styles.button} create-Button">Create</button><button class="${styles.button} update-Button">Update</button><button class="${styles.button} delete-Button">Delete</button><button class="${styles.button} clear-Button">Clear</button></td></tr></table><div id="tblRegistrationDetails"></div></div>`;this.setButtonsEventHandlers();this.getListData();
- Here we have define 2 variables-
- Listname : It contains the name of the SharePoint list upon which we are going to perform CRUD operations.
- listItemId : it will contain the ID of the item we are going to Update/Delete/Read.
- There are 2 functions used here. These are going to be define next -
- setButtonsEventHandlers
- getListData
- In above HTML, we had displayed 4 input control "Full Name", "Address", "Mobile" and "Email ID".
- In all, 5 buttons have been added
- Find : To get the record from list
- Create : To insert a new record in list
- Update : To update the existing record in list
- Delete : To delete the existing record from list
- Clear : To clear the input controls
- Next we will add function to assign EventListners to these buttons using below code. It will be added just after the closing bracket of above code-
- private setButtonsEventHandlers(): void {const webPart: CrudOperationsBySpFxWebPartWebPart = this;this.domElement.querySelector('button.find-Button').addEventListener('click', () => { webPart.find(); });this.domElement.querySelector('button.create-Button').addEventListener('click', () => { webPart.save(); });this.domElement.querySelector('button.update-Button').addEventListener('click', () => { webPart.update(); });this.domElement.querySelector('button.delete-Button').addEventListener('click', () => { webPart.delete(); });this.domElement.querySelector('button.clear-Button').addEventListener('click', () => { webPart.clear(); });}

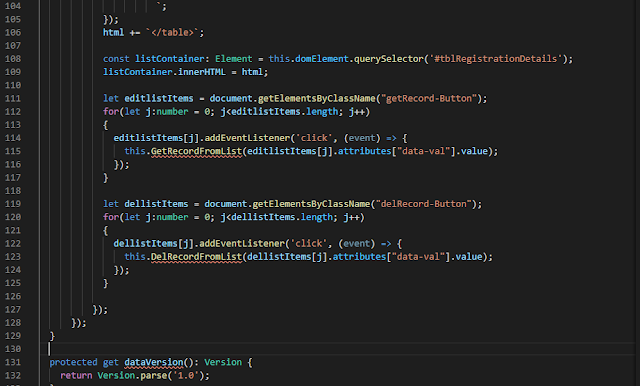
- Next, add getListData function as below-
- private getListData() {let html: string = '<table border=1 width=100% style="border-collapse: collapse;">';html += `<th>Full Name</th><th>Address</th><th>Email ID</th><th>Phone Number</th><th>Edit</th><th>Delete</th>`;this.context.spHttpClient.get(`${this.context.pageContext.web.absoluteUrl}/_api/web/lists/getbytitle('${this.Listname}')/items`, SPHttpClient.configurations.v1).then(response => {return response.json().then((items: any): void => {console.log('items.value: ', items.value);let listItems: IRegistrationDetails[] = items.value;console.log('list items: ', listItems);listItems.forEach((item: IRegistrationDetails) => {html += `<tr><td>${item.Title}</td><td>${item.Address}</td><td>${item.EmailID}</td><td>${item.Mobile}</td><td><button id="btnGetRecordData" class="${styles.button} getRecord-Button" data-val="${item.EmailID}">Edit</button></td><td><button id="btnDelRecordData" class="${styles.button} delRecord-Button" data-val="${item.Id}">Delete</button></td></tr>`;});html += `</table>`;const listContainer: Element = this.domElement.querySelector('#tblRegistrationDetails');listContainer.innerHTML = html;let editlistItems = document.getElementsByClassName("getRecord-Button");for(let j:number = 0; j<editlistItems.length; j++){editlistItems[j].addEventListener('click', (event) => {this.GetRecordFromList(editlistItems[j].attributes["data-val"].value);});}let dellistItems = document.getElementsByClassName("delRecord-Button");for(let j:number = 0; j<dellistItems.length; j++){dellistItems[j].addEventListener('click', (event) => {this.DelRecordFromList(dellistItems[j].attributes["data-val"].value);});}});});}

- Now we have to add functions that are need to be executed when user clicks on "Find/Create/Update/Delete/Clear"buttons. I am giving all 5 functions here as below. Just add after the getListData function.
- private find(): void {let emailId = prompt("Enter the Email ID");this.context.spHttpClient.get(`${this.context.pageContext.web.absoluteUrl}/_api/web/lists/getbytitle('${this.Listname}')/items?$select=*&$filter=EmailID eq '${emailId}'`, SPHttpClient.configurations.v1).then(response => {return response.json().then((item: any): void => {document.getElementById('idFullName')["value"] = item.value[0].Title;document.getElementById('idAddress')["value"] = item.value[0].Address;document.getElementById('idEmailId')["value"] = item.value[0].EmailID;document.getElementById('idPhoneNumber')["value"] = item.value[0].Mobile;this.listItemId = item.value[0].Id;});});}
- private save(): void {const body: string = JSON.stringify({'Title': document.getElementById('idFullName')["value"],'Address': document.getElementById('idAddress')["value"],'EmailID': document.getElementById('idEmailId')["value"],'Mobile': document.getElementById('idPhoneNumber')["value"],});this.context.spHttpClient.post(`${this.context.pageContext.web.absoluteUrl}/_api/web/lists/getbytitle('${this.Listname}')/items`,SPHttpClient.configurations.v1,{headers: {'Accept': 'application/json;odata=nometadata','X-HTTP-Method': 'POST'},body: body}).then((response: SPHttpClientResponse): void => {this.getListData();this.clear();alert('Item has been successfully Saved ');}, (error: any): void => {alert(`${error}`);});}
- private update(): void {const body: string = JSON.stringify({'Title': document.getElementById('idFullName')["value"],'Address': document.getElementById('idAddress')["value"],'EmailID': document.getElementById('idEmailId')["value"],'Mobile': document.getElementById('idPhoneNumber')["value"],});this.context.spHttpClient.post(`${this.context.pageContext.web.absoluteUrl}/_api/web/lists/getbytitle('${this.Listname}')/items(${this.listItemId})`,SPHttpClient.configurations.v1,{headers: {'Accept': 'application/json;odata=nometadata','IF-MATCH': '*','X-HTTP-Method': 'PATCH'},body: body}).then((response: SPHttpClientResponse): void => {this.getListData();this.clear();alert(`Item successfully updated`);}, (error: any): void => {alert(`${error}`);});}
- private delete(): void {if (!window.confirm('Are you sure you want to delete the this/latest item?')) {return;}this.context.spHttpClient.post(`${this.context.pageContext.web.absoluteUrl}/_api/web/lists/getbytitle('${this.Listname}')/items(${this.listItemId})`,SPHttpClient.configurations.v1,{headers: {'Accept': 'application/json;odata=nometadata','IF-MATCH': '*','X-HTTP-Method': 'DELETE'}}).then((response: SPHttpClientResponse): void => {alert(`Item successfully Deleted`);this.getListData();this.clear();}, (error: any): void => {alert(`${error}`);});}
- private clear(): void {document.getElementById('idFullName')["value"] = "";document.getElementById('idAddress')["value"] = "";document.getElementById('idEmailId')["value"] = "";document.getElementById('idPhoneNumber')["value"] = "";}
- It will looks like as below-


- Two more functions needs to be added. These were executed when user will click on "Edit" / "Delete" button which are provided inline in grid.
- private GetRecordFromList(emailId): void {this.context.spHttpClient.get(`${this.context.pageContext.web.absoluteUrl}/_api/web/lists/getbytitle('${this.Listname}')/items?$select=*&$filter=EmailID eq '${emailId}'`, SPHttpClient.configurations.v1).then(response => {return response.json().then((item: any): void => {document.getElementById('idFullName')["value"] = item.value[0].Title;document.getElementById('idAddress')["value"] = item.value[0].Address;document.getElementById('idEmailId')["value"] = item.value[0].EmailID;document.getElementById('idPhoneNumber')["value"] = item.value[0].Mobile;this.listItemId = item.value[0].Id;});});}
- private DelRecordFromList(Id): void {if (!window.confirm('Are you sure you want to delete this item?')) {return;}this.context.spHttpClient.post(`${this.context.pageContext.web.absoluteUrl}/_api/web/lists/getbytitle('${this.Listname}')/items(${Id})`,SPHttpClient.configurations.v1,{headers: {'Accept': 'application/json;odata=nometadata','IF-MATCH': '*','X-HTTP-Method': 'DELETE'}}).then((response: SPHttpClientResponse): void => {alert(`Item successfully Deleted`);this.getListData();this.clear();}, (error: any): void => {alert(`${error}`);});}
- These will look as below-


- With this code part has been completed. Now come back to the workbench site. The SharePoint site where we had created the list "Registration Details". For this the best way is to go to the SharePoint list as below-

- Now replace the visible part of URL in above screenshot with "/_layouts/15/workbench.aspx"
- It will look like as below-

- In case, if the webpart is not displayed, please follow steps 17,18,19 to add the webpart in workbench.
- Now, let's add some records.

- Now click on Create button. Record will be inserted in SharePoint list and a confirmation popup will be displayed. Grid will be refreshed.


- Now, we have 2 options to edit any record.
- Click on "Find" button. A popup will appear for Email input. Provide the value and click on OK. It will populate the record in respective fields. Now make changes and click on Update button.
- Click on Edit button provided in grid ahead of each record. It will populate the record in respective fields. Now make changes and click on Update button.
- Similarly, for deletion-
- Click on "Find" button. A popup will appear for Email input. Provide the value and click on OK. It will populate the record in respective fields. Now click on Delete button.
- Click on Delete button provided in grid ahead of each record. It will delete the record.
- Clear button is to reset the input fields.
- I know, you are still curious about that record whether it has been finally saved in SharePoint list or not. Let's check the SharePoint list-

- There may be chance that when open your SharePoint site workbench page, you may get something weird as below screenshot. Don't panic, this may appear due to the reason that you haven't executed "gulp serve" command. Please verify if gulp is running. If it is running and you still facing the issue, please stop the gulp using Ctrl+C (then press Y to terminate batch job), close all browsers. Then again start gulp by using command "gulp serve". It will open your local workbench in browser. Now open your SharePoint site workbench in another tab and now you will find your SPFx webpart there.


This way, we can make CRUD operations using SPFx webpart.
- Refer more details upon SPFx WebPart, please visit Microsoft Website.
Update (Date: 14 June 2021):-
- In case, if you wish to get the ID of the record created using Save command, it might be possible you won't get here. for this, you need to update "odata=nometadata" with "odata.metadata=minimal".
- Further, you need to create a .ts file with name IListItem. Define an interface with all the columns of list in this interface.
- Import this interface in ...WebPart.ts file.
- Then update the existing code with below one-
this.context.spHttpClient.post(`${this.context.pageContext.web.absoluteUrl}/_api/web/lists/getbytitle('${this.properties.listName}')/items`,
      SPHttpClient.configurations.v1,
      {
        headers: {
          'Accept': 'application/json;odata.metadata=minimal',
          'Content-type': 'application/json;odata.metadata=minimal',
          'X-HTTP-Method': 'POST'
        },
        body: body
      }).then((response: SPHttpClientResponse): Promise<IListItem> => {
        return response.json();
      })
      .then((item:IListItem):void=>{
        alert(`Item '${item.Name}' (ID: ${item.ID}) successfully created`)
      }, (error: any): void => {
        alert(`${error}`);
      });
- The process is explained in my ReactJS post.
No comments:
Post a Comment
Note: Only a member of this blog may post a comment.