Welcome back with another post on PowerApps. Sometimes, the client asks that when a user clicks on any row in gallery, it should be highlighted. As of know, there is no direct feature. However, we can achieve using a very small piece of code. The expected outcome is-


Let's start-
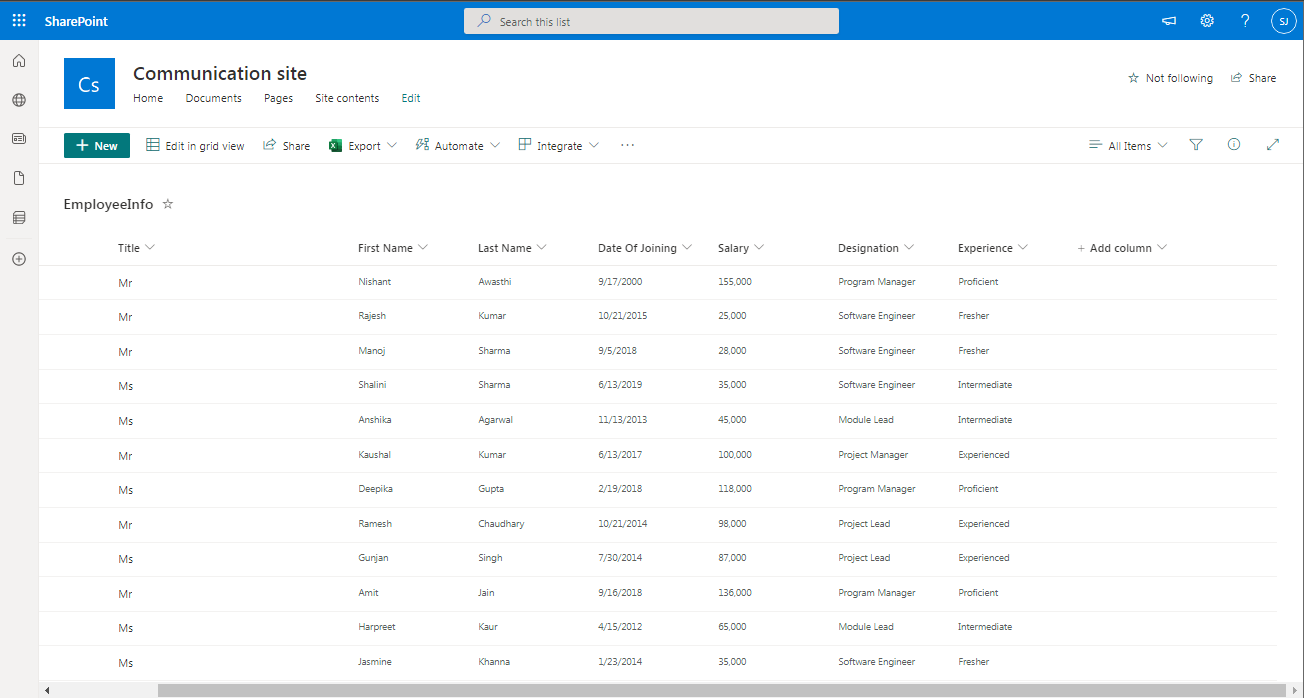
- First create a list "EmployeeInfo" in SharePoint and have some records.

- Now, open the PowerApps maker portal and create a canvas app.

- There will a screen by default "Screen1". Rename it to "ScreenViewByExperience".
- Add the list "EmployeeInfo" as DataSource.


- Now, add a "Blank flexible height gallery" and rename it to ParentGallery.


- Update below properties of "ParentGallery"-
- X: 0
- Y: 100
- Width: ScreenViewByExperience.Width
- Height: ScreenViewByExperience.Height-ParentGallery.Y
- Items: Distinct(EmployeeInfo,Experience.Value)
- Now, click on template edit icon and add a "Label" and another "Blank flexible height gallery".

- For Label, update below properties:
- Name: Label_Experience
- Text: ThisItem.Result
- X: 0
- Y: 0
- Width: Parent.Width
- Height: 40
- Fill: RGBA(0, 13, 75, 1)
- Color: RGBA(255, 255, 255, 1)
- The outcome will be-

- Similarly, update the properties of child gallery as below
- Name: ChildGallery
- X: 0
- Y: Label_Experience.Y+Label_Experience.Height
- Width: Parent.Width
- Height: Parent.TemplateHeight-Label_Experience.Y-Label_Experience.Height
- Items: Filter(EmployeeInfo,ThisItem.Result in Experience.Value)
- TemplateSize: 40
- TemplatePadding: 0
- The outcome will be-

- Now, edit the ChildGallery again and add 2 labels to show "First Name" and "Last Name". Link them with ThisItem.'First Name' and ThisItem.'Last Name'.

- We have the basic structure ready. Now, comes to the actual part.
- Click on App >> OnStart property and add below code.
Set(vrSelectedItemID,0);
Set(vrClickCounter,0);
- We have initialized 2 variables-
- vrSelectedItemID- It will capture the ID of the item, user has clicked and will be used to validate the upon next click whether the same item is re-clicked or other item is clicked.
- vrClickCounter- It will capture the count of click for a particular item

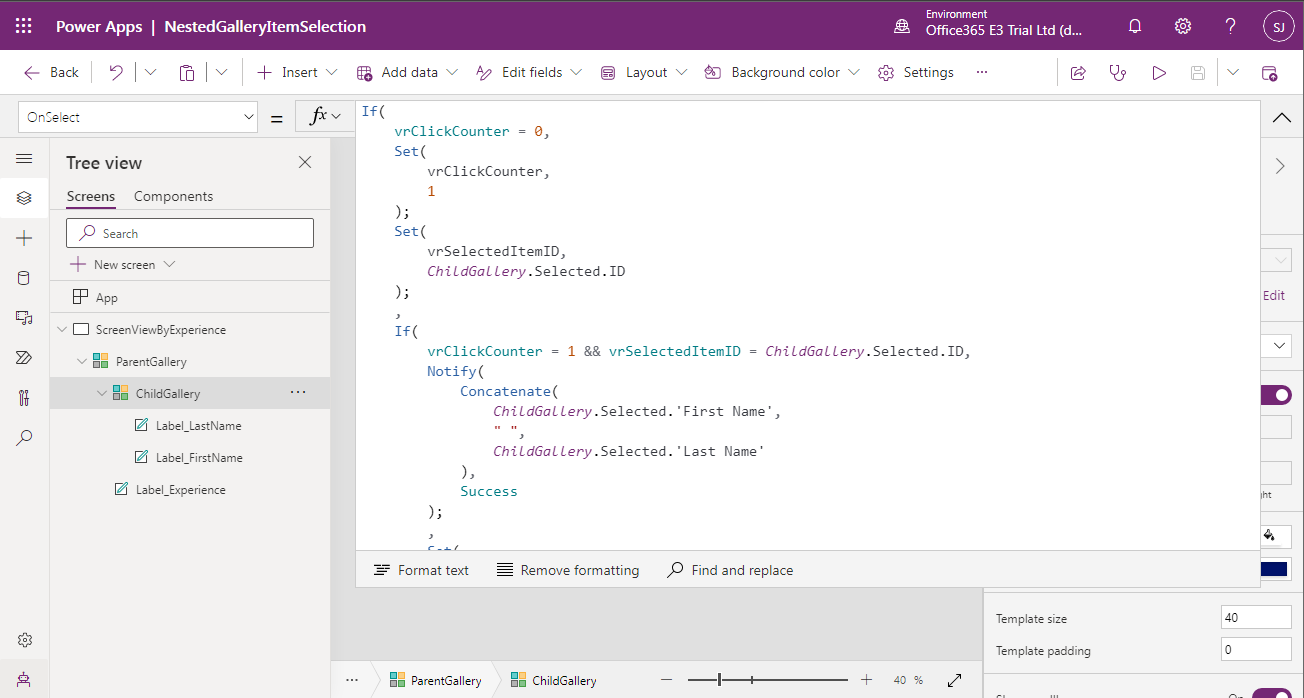
- Now, click on ChildGallery >> OnSelect property and write below code
If(
    vrClickCounter = 0,
    Set(
        vrClickCounter,
        1
    );
    Set(
        vrSelectedItemID,
        ChildGallery.Selected.ID
    );
    ,
    If(
        vrClickCounter = 1 && vrSelectedItemID = ChildGallery.Selected.ID,
        Notify(
            Concatenate(
                ChildGallery.Selected.'First Name',
                " ",
                ChildGallery.Selected.'Last Name'
            ),
            Success
        );
        ,
        Set(
            vrSelectedItemID,
            ChildGallery.Selected.ID
        );
    )
)
- The outcome is-

- Next, click on ChildGallery >> TemplateFill property and write below code.
If(vrSelectedItemID = ThisItem.ID,RGBA(244, 196, 48, 1),RGBA(0, 0, 0, 0))
- The outcome is-

- Save the application, publish it and run/play.
- On Load-

- Clicked "Deepika Gupta"

- Clicked "Manoj Sharma"

- Re-Clicked "Manoj Sharma"

- This is how, you can achieve the functionality. If you want to navigate to another screen upon double click, then instead of using Notify, use Navigate function.
- In case, if you wish to give user the "Hand" experience upon hover, then replace the labels used in child gallery with buttons and update the properties as below-
Color RGBA(0, 13, 75, 1) Fill Transparent BorderColor Transparent DisabledColor Self.Color DisabledFill Self.Fill DisabledBorderColor Self.BorderColor PressedColor Self.Color PressedFill Self.Fill PressedBorderColor Self.BorderColor HoverColor Self.Color HoverFill Self.Fill HoverBorderColor Self.BorderColor BorderStyle None BorderThickness 0 OnSelect Select(Parent) BorderRadius 0 - After replacing labels with buttons, below is the outcome-


- As we can see, there is no difference in the outcome. However, when you hover the mouse upon the item, you will find the cursor converted into Hand.


With this, I am concluding this post.
Happy Coding !!!
Will see you again with some new topics.
Stay Safe !
Stay Healthy !
No comments:
Post a Comment
Note: Only a member of this blog may post a comment.