Hello Friends,
Welcome again with my new post on PowerApps. In real life development, most of the times we had a scenario when we have to get data from different SharePoint lists depending upon each other. In other words, we need to implement Cascading. Let's see how can we achieve Cascading in PowerApps.
First discuss the scenario- Suppose we have to create an Employee Form. It can have several information. We will focus on only 3 fields-
- Employee Name
- Country
- State
- First create a SharePoint list name "Country". It will be having "Title" column by default. We will use it to store country names-

- Now add some records to it-

- Now create another list named "State". The default column "Title" will be used to store state names. Add another column named "Country" which will be a lookup column to link data from list "Country" with column "Title"-


- Add some records-

- Now create a list "Employees". The default Title column will be used to capture employee names. Add two other columns-
- Country >> LookUp >> Country (list) >> Title (country list column)
- State >>>> LookUp >> State (list) >> Title (state list column)


- Now open the PowerApp Portal by Clicking Here or click on the link "https://create.powerapps.com/".
- It will ask to Login (Authenticate). Once you provide the valid credentials, it will take you to Power Apps home page.


- Now we will start from creating a "Blank App" using "Phone layout" as marked in above screenshot. it will show you a popup. Just click on "Skip" as we will do from scratch.

- A blank screen canvas will be created by PowerApps by default.

- Click on "Home" >> "New Screen" >> "Form". It will a new screen "Screen2".

- Now delete the first screen "Screen1". For this, click on Ellipses (3 dots) displaying ahead to Screen1 then click on Delete. Now only "Screen2" will remain in system.

- Click on "connect to data" displayed on form screen-

- Clicking on "connect to data" shows a list of Entities & Connectors. Click on Connectors and select "SharePoint"-

- Clicking on SharePoint shows a list of already established connections (if any) and a link to add a new connection "Add a connection".

- If there is no established connection then click on "Add a connection". It will ask you to choose How to connect-

- Click on connect.
- With this, it will be connected to the SharePoint account and will ask you to choose the SharePoint Portal where you had created your SharePoint lists. In case, if there was already a connection in Step 13, then you will land on this screen (means Step 14 & 15 are to establish a connection and finally land to same screen)-

- You will find all SharePoint portal you have access with the account you logged in. Choose the portal where you had created lists (Country, State, Employees). By clicking on the portal link, it will populate the lists available. Click on Employees list and click on Connect button provided at bottom.

- It will look like-

- Well, now we will place some controls on screen-
- Text label
- Rename Label1 >> lblEmployeeName
- Properties >> Text >> Employee Name
- Text input
- Rename TextInput1 >> txtEmployeeName
- Properties >> Default >> Employee Name
- Text label
- Rename Label2 >> lblCountry
- Properties >> Text >> Country
- Drop down
- Rename Dropdown1 >> ddCountry
- Items >> Connectors >> SharePoint >> Select Connection >> Select SharePoint Site >> Select Country list
- Value >> Title


- Text label
- Rename Label3 >> lblState
- Properties >> Text >> State
- Drop down
- Rename Dropdown2 >> ddState
- Items >> Connectors >> SharePoint >> Select Connection >> Select SharePoint Site >> Select State list
- Value >> Title

- Apply cascading for State dropdown. For this click on "ddState" dropdown then change the function for "Items" from "State_1" to "Filter(State_1, Country.Value = ddCountry.SelectedText.Value)"


- Finally add a Button to the data to list-
- Button
- Rename Button1 >> btnSubmit
- Properties >> Text >> Add Employee
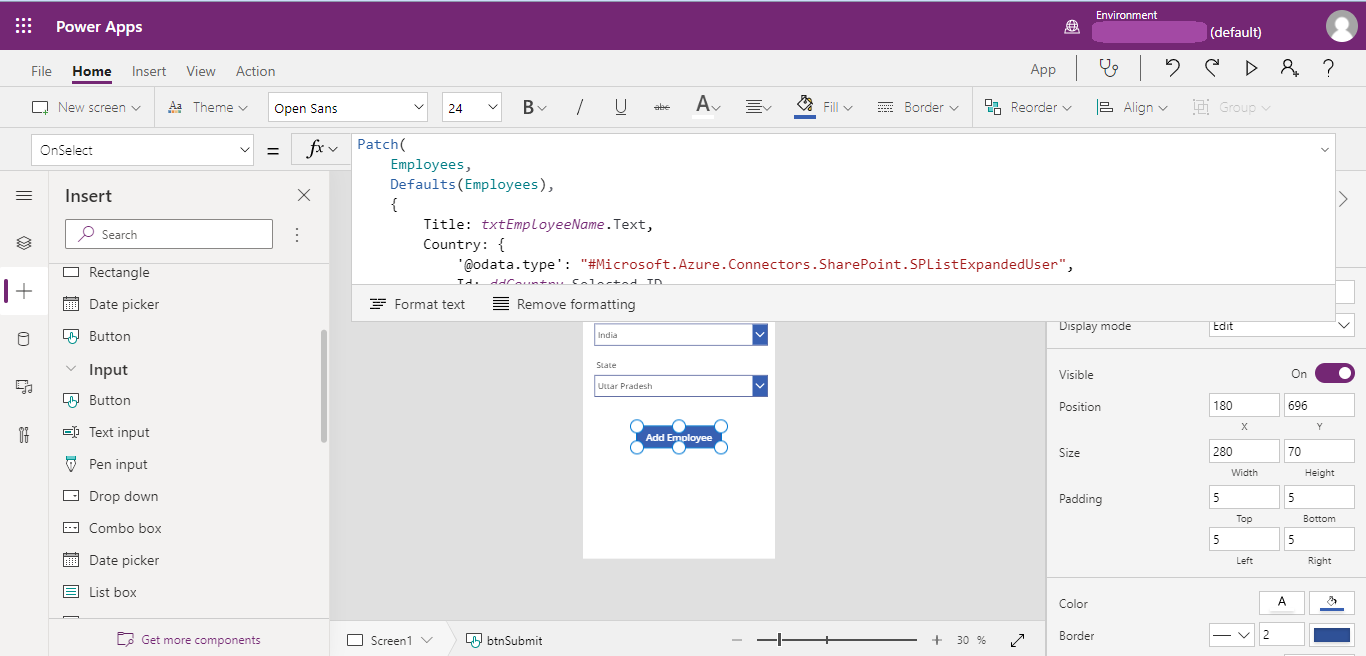
- Now update the OnSelect command to post data to the list. Change the function from "false" to below code-
Patch(
    Employees,
    Defaults(Employees),
    {
Title: txtEmployeeName.Text,
        Country:
    {
        '@odata.type': "#Microsoft.Azure.Connectors.SharePoint.SPListExpandedUser",
            Id: ddCountry.Selected.ID,
            Value: ddCountry.Selected.Title
        },
        State:
    {
        '@odata.type': "#Microsoft.Azure.Connectors.SharePoint.SPListExpandedUser",
            Id: ddState.Selected.ID,
            Value: ddState.Selected.Title
        }
}
);
Notify("Employee Added Successfully!!!");
- BEFORE-

- AFTER-

- All Done!
- Now it's time to test the functionality. Click on Preview button located at top right side (triangle with right side arrow). If everything goes fine. It will populate Country and State data from SharePoint list.

- Yess!, It's working. Country and State data has been loaded. Now play with Country & State dropdown. By changing the Country dropdown, related States getting populated. Let me freeze data as:-
- Employee Name - Sachin Jain
- Country - India
- State - Delhi
- Click on "Add Employee" button.


- Wow! Record saved successfully. You may close the preview screen by clicking on "X" sign placed at top right corner.
- It will take you back to design screen.
- Hey! but did you check the SharePoint List "Employees" ? Let's check if the record is actually inserted in list or not?

- Wow, it's there. The record, we had inserted, is reflecting here.


This way, we can implement Cascading in dropdowns.
See you again with some new topics.
No comments:
Post a Comment
Note: Only a member of this blog may post a comment.