Hello Friends,
Welcome back with another post on SharePoint Online. Today we will see how to customize SharePoint List Forms. As we know, there is no much scope to customize List forms. However, Microsoft has given some feature to do so using JSON. Every SharePoint list form (New / Edit / View) has 3 sections - Header, Body, Footer. Microsoft has provided feature to give a customization any or all of these sections as per our requirement. Here, we will try to customize all these 3 sections. So, what are we waiting for. Let's start-
- Suppose we have a SharePoint list - FGasolineMaster.

- In order to add a record, it has New Item Form.

- Now, let's the requirement from client is to change the title from "New Item" to "Gasoline Rates" with some background color and some CSS also. So, how we can do it?
- To achieve this, click on the "Edit Form" icon provided at top right corner of the page (if you are having sufficient credentials. In case, if you are not getting the icon, please assign yourself as Site Collection Admin)
- It will look like as below-

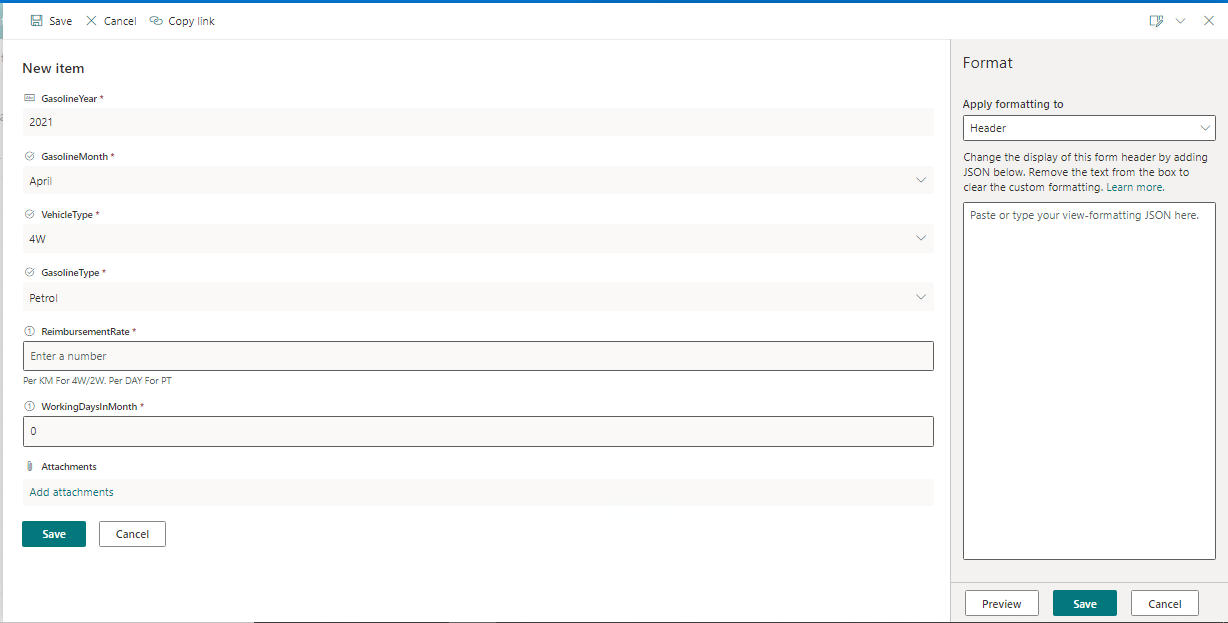
- Now click on "Configure Layout" option. It will load a section on right side as below-

- This is the magical section. Here will be place our CSS and all the things in the form of JSON. Choose the "Header" in "Apply formatting to" drop down. Place the below code in the space provided for JSON-
- {
    "debugMode": true,
    "elmType": "div",
    "attributes": {
        "class": "ReactClientFormDefaultHeader"
    },
    "style": {
        "height": "10px",
        "color": "#fff",
        "font-size": "14px",
        "border-top": "5px solid #eee",
        "background-color": "#BA55D3",
        "padding": "10px",
	"font-weight": "bold"
    },
    "children": [
        {
            "elmType": "div",
            "txtContent": "Gasoline Rates"
        }
    ]
}
- The class "ReactClientFormDefaultHeader" (normally it's a standard class applied by Microsoft) can be found as below-

- You can write your own text in place of "Gasoline Rates".
- If you don't wish to apply any additional CSS, you may skip the piece of code highlighted in lime color.
- Click on "Preview" button. It will change the Header of page as below-

- Click on Save button to save the changes.
- The similar process is for Footer. To achieve this, follow steps from 6 - 11 by choosing Footer instead of Header this time. The piece of code to be added as JSON is as below-
- {
    "debugMode": true,
    "elmType": "div",
    "txtContent": "A Small Initiative By Sachin Jain",
    "style": {
        "height": "10px",
        "color": "#fff",
        "font-size": "15px",
        "border-top": "5px solid #eee",
        "background-color": "#BA55D3",
        "padding": "10px",
	"font-weight":"bold",
	"font-style":"italics"
    }
}
- Click on "Preview" button. It will change the Footer of page as below-

- Click on Save button to save the changes.
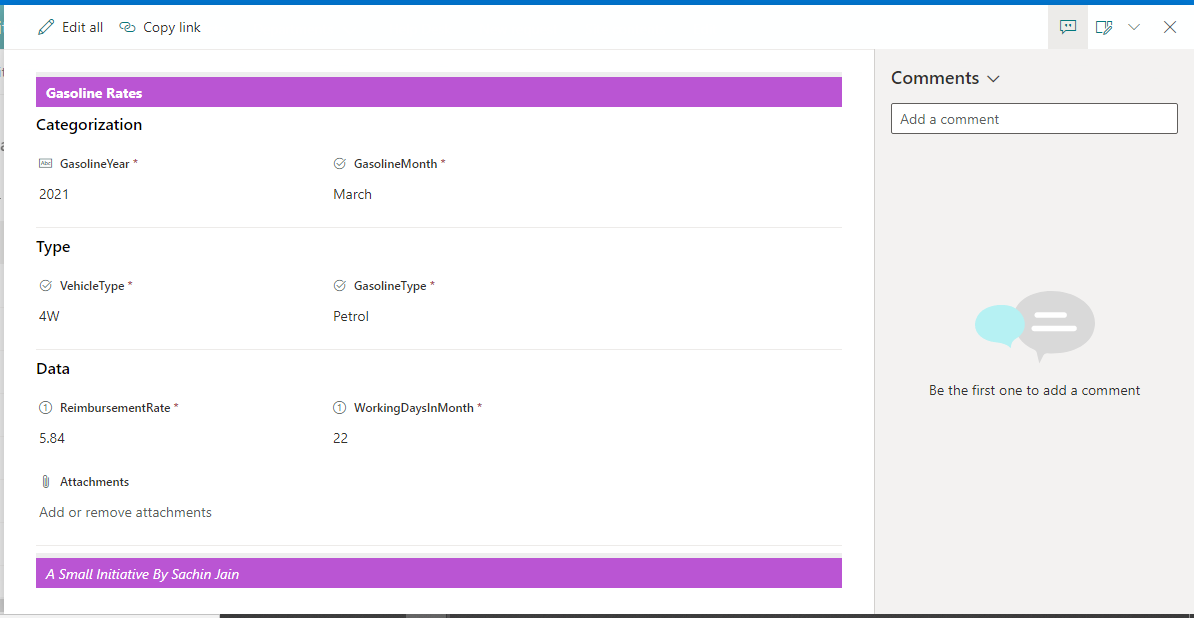
- The process for managing the body is also somehow similar. Steps are common but the JSON is different. Here we can divide the fields into sections. Here, I am dividing the fields into 3 sections-
- Categorization
- Type
- Data
- The JSON will be as below-
- {
    "sections": [
        {
            "displayname": "Categorization",
            "fields": [
                "GasolineYear",
                "GasolineMonth"
            ]
        },
        {
            "displayname": "Type",
            "fields": [
                "VehicleType",
                "GasolineType"
            ]
        },
        {
            "displayname": "Data",
            "fields": [
                "ReimbursementRate",
		"WorkingDaysInMonth",
                "Attachments"
            ]
        }
    ]
}
- You may create sections as per your requirement. The field names are the internal names. This can be find from the URL, when you click on any field in List settings. as, by clicking on any field opens it in edit mode, here, you can find the field internal name from the last portion of the URL formed.

- So, the final outcome of editing the body section will be as below-

- The Preview button was not giving me any preview here in my case. I tried on couple of lists but no luck. Then I finally went to Save the changes.
- Now, finally, I reloaded the site and clicked on New Item form.
- Wow! It's was looking as below-

- This way, you can customize the list forms upto an extent. The only cons is that the changes you had made, is applicable to all 3 forms (New / Edit / View). You cannot customize all 3 forms separately. This can be a PROS or can be a CONS. 😉
- Edit Form-

- View Form-


With this, I am concluding this post.
Happy Coding !!!
Will see you again with some new topics.
Stay Safe !
Stay Healthy !
No comments:
Post a Comment
Note: Only a member of this blog may post a comment.