Showing posts with label Users. Show all posts

Thursday, September 8, 2022

PowerApps: Search User In Azure AD

Hello Friends,
Welcome back with another post on PowerApps. In previous post, we learned about fetching of groups and then it's members.


Today, we will learn about fetching the Users from Azure AD. So, let's start-
  1. Add a blank screen named "ScreenADUsers".
  2. Now Add below controls-
    1. Label - lblSearchUserLabel
    2. Text Input - txtSearchUserText
    3. Button - btnLoadUsers
    4. DataTable - dtUsers
  3. Initially, add Label, Text input, button.
  4. Now, click on "Data" link from left navigation menu and the click on "Add data".
  5. Here we will add "Office 365 Groups" connection. Search for "office 365".
  6. Select the "Office 365 Users" connector.
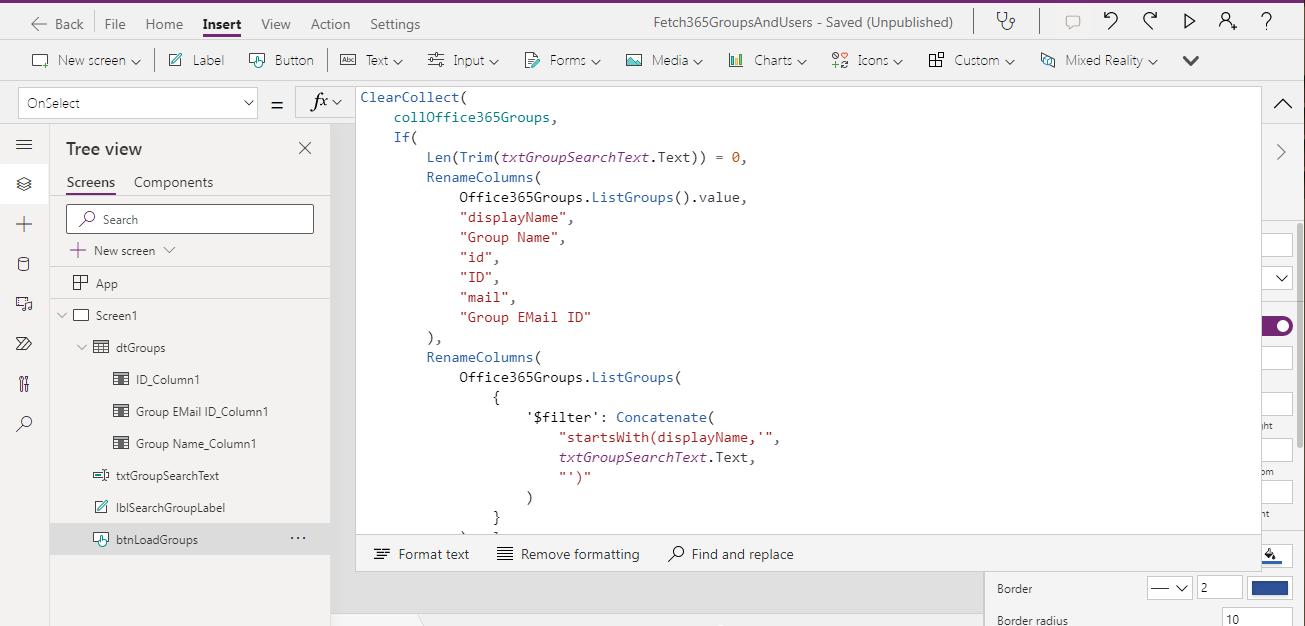
  7. Now, on "OnSelect" property of btnLoadGroups, we will add below code to fetch Users.
    1. ClearCollect(
          collOffice365Users,
          RenameColumns(
              Office365Users.SearchUser({searchTerm: txtSearchUserText.Text}),
              "DisplayName",
              "Member Name",
              "Mail",
              "Email ID",
              "Id",
              "ID",
              "UserPrincipalName",
              "User Principal Name"
          )
      );
      
  8. Run the app and click on button so that the collection get its structure.
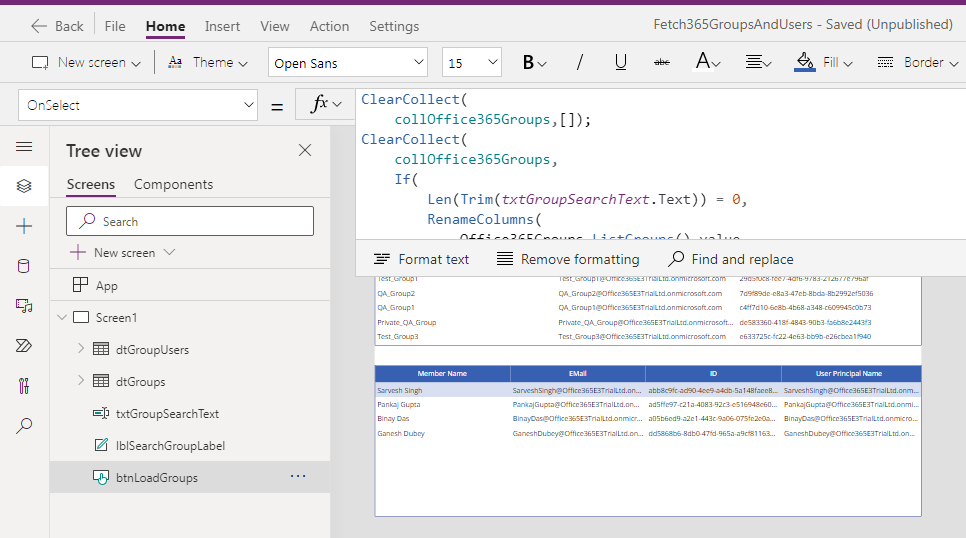
  9. Now, add one DataTable (as mentioned above) named "dtUsers'. Provide the collOffice365Groups as Data Source. Then click on "Edit Fields" link and choose "Member Name", "ID", "Email ID", "User Principal Name".
  10. That's all. Publish the app and see the magic.
  11. If the text will be blank, it will fetch all users, otherwise, based upon the input, it will search the data.
  12. This is how, you can fetch the users.
With this, I am concluding this post.
Happy Coding !!!
Will see you again with some new topics.

Stay Safe !
Stay Healthy !

PowerApps: Fetch Groups And Users

Hello Friends,
Welcome back with another post on PowerApps. Today, we will learn about fetching the Microsoft 365 groups created in AD and then it's members. So, let's start
  1. Open the PowerApps maker portal and create a Canvas App.
  2. Add-
    1. Label - lblSearchGroupLabel
    2. Text Input - txtGroupSearchText
    3. Button - btnLoadGroups
    4. DataTable - dtGroups
    5. DataTable - dtGroupMembers
  3. Initially, add Label, Text input, button.
  4. Now, click on "Data" link from left navigation menu and the click on "Add data".
  5. Here we will add "Office 365 Groups" connection. Search for "office 365".
  6. Select the "Office 365 Groups" connector.
  7. Now, on "OnSelect" property of btnLoadGroups, we will add below code to fetch Groups.
    1. ClearCollect(
          collOffice365Groups,
          If(
              Len(Trim(txtGroupSearchText.Text)) = 0,
              RenameColumns(
                  Office365Groups.ListGroups().value,
                  "displayName",
                  "Group Name",
                  "id",
                  "ID",
                  "mail",
                  "Group EMail ID"
              ),
              RenameColumns(
                  Office365Groups.ListGroups(
                      {
                          '$filter': Concatenate(
                              "startsWith(displayName,'",
                              txtGroupSearchText.Text,
                              "')"
                          )
                      }
                  ).value,
                  "displayName",
                  "Group Name",
                  "id",
                  "ID",
                  "mail",
                  "Group EMail ID"
              )
          )
      );
      
  8. Run the app and click on button so that the collection get its structure.
  9. Now, add one DataTable (as mentioned above) named "dtGroups'. Provide the collOffice365Groups as Data Source. Then click on "Edit Fields" link and choose "Group Name", "ID", "Group Mail ID". 
  10. Now, we want to fetch the members of the group, which is selected by user in data table. So, for that, click on "ID_Column1" and choose the "OnSelect" property from the property dropdown.
  11. Now update the logic as below-
    1. ClearCollect(
          collOffice365GroupMembers,
          RenameColumns(
              Office365Groups.ListGroupMembers(dtGroups.Selected.ID).value,
              "displayName",
              "Member Name",
              "id",
              "ID",
              "mail",
              "EMail",
              "userPrincipalName",
              "User Principal Name"
          )
      );
      
  12. Now, this code will work only if the user clicks on ID column cell. If the user clicks on "Group Name" or "Group Email ID" column, it will not work.
  13. For that, select these columns and update the "OnSelect" property as below.
  14. Now, save the app and play. Load the groups and click on one of the group ID from data table "dtGroups". It will load the data in collOffice365GroupMembers collection.
  15. Now add another data table "dtGroupMembers".
  16. Select Data Source as collOffice365GroupMembers. Then click on Edit Fields and then click on Add field. Choose "Member Name", "EMail", "ID", "User Principal Name".
  17. Save the app and play it. click on Load Groups button then select any group from the dtGroups table.
  18. The only problem is that when we click on "Load Groups" button, the dtGroups gets loaded but the members of the default selected group doesn't populate in dtGroupMembers table.
  19. Don't worry, just copy the code written on "ID" column >> OnSelect property of dtGroups table and paste it at the end of OnSelect code of btnLoadGroups.
  20. Save the app and play it again.
  21. Now, the only issue you may face is that if the dtGroups is already populated with groups and you make a new search, the dtGroupMembers table doesn't get updated. For this, just clear the collOffice365Groups in the beginning of button click code.
  22. That's all.
  23. This is how, you can play with Office 365 groups and their members in PowerApps.
With this, I am concluding this post.
Happy Coding !!!
Will see you again with some new topics.

Stay Safe !
Stay Healthy !

Friday, May 13, 2022

Power Automate: Get Azure Active Directory Group Users

Hello Friends.

Welcome back with another post on Power Automate. Today, we will learn about How to get users from Azure Active Directory Group through Power Automate. Sometimes, there are the requirements that we need to send mails to some users that belongs to a particular AD group. Therefore, our approach will first to get all the users from that AD group and then perform activity (like sending email) as per the application requirement. Let's start.

  1. Create a blank "Instant cloud flow" with trigger as "Manually trigger a flow". Give it a name - ExtractADGroupUsers.
  2. Now, we need the ID of that AD Group for which, users need to extract. You may ask this ID either from the AD Admin or you can add that group in your SharePoint site and then click on that group, it's account filed will give you the ID of that group. The GUID after the "tenant|" is the ID of the group.
  3. Now, go back to the flow and add an action "List group members" under "Office 365 Groups" category.
  4. It will ask the Group ID. Input the ID we had copied from SharePoint discussed above.
  5. Save it and Test it.
  6. It will give us a JSON of all the users belong to this group. The attribute, which is important for us is "mail" and then "displayname". The primary is "mail".
  7. Now, edit the flow again and initialize an array, in which you need to store the Email IDs.
  8. Now, we need to use an "Apply to each" action to capture the EmailIDs and store in array. During this process, we will also check that EMail ID must not be null.
  9. That's all.
  10. If you wish to see, what all email ids have been captured, you may initialize another array and assign it with arrayGroupUserEMails array.
  11. Now Test the flow.
  12. As you can see from above screenshots, the flow ran successfully and we have extracted users belongs to the group.
  13. This is the shortest and straight way to perform the activity.
  14. However, there can be other ways as well to perform the same activity like-
  15. First- use the Select action to get the Emails only
  16. Then use "Apply to each" action to add emails in array.
  17. Second- use the "Filter" action to filter out null emails items.
  18. Then use "Apply to each" action to add emails in array.
  19. However, the results would remain same in all the cases.
With this, I am concluding this post.
Happy Coding !!!
Will see you again with some new topics.
Stay Safe !
Stay Healthy !