Welcome back with another post on PowerApps. We had discussed about pagination in some of our earlier posts. Today, we will try to create a component, which will provide the pagination feature and can be used with any gallery / data table. This component will provide you the features-
- To show current 10 pages (1,2...10 or 11,12...20).
- To show Prev / Next button with show / hide feature based upon the page you are currently visiting.
- To show the total number of items.
- To select the Page Size (number of items you want to show on one page). (Homework For You) 😊
.gif)
Let's start-
- Login to PowerApps Maker Portal and create a new blank canvas app and give a suitable name.

- Click on Components and then click on "+ New component" to add a component. Set properties of component screen as-
- Name: SJPagination
- Width: 1000
- Height: 50
- Fill: RGBA(0, 0, 0, 1)

- Add below custom properties-
- Total Items
- Display Name: Total Items
- Name: TotalItems
- Property Type: Input
- Data Type: Number
- Page Size
- Display Name: Page Size
- Name: PageSize
- Property Type: Input
- Data Type: Number
- Page Number
- Display Name: Page Number
- Name: PageNumber
- Property Type: Output
- Data Type: Number

- Click on Component name (SJPagination from left tree view and set the default values for above input properties-
- TotalItems: 100
- PageSize: 10
- Add a Text label to show number of items.
- Name: lblTotalItems
- Text: Concatenate(Text(SJPagination.TotalItems)," items")
- Align: Align.Center
- LineHeight: 1
- X: SJPagination.Width-Self.Width
- Y: 0
- Width: 120
- Height: SJPagination.Height
- PaddingTop: 0
- PaddingBottom: Self.PaddingTop
- PaddingLeft: Self.PaddingTop
- PaddingRight: Self.PaddingTop
- Color: RGBA(0, 0, 0, 1)
- Fill: RGBA(255, 255, 0, 1)
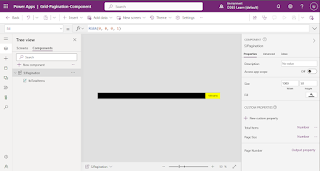
- Add Blank horizontal gallery and set properties as below-
- Name: gal_BHG_Pagination
- X: (SJPagination.Width-Self.Width)/2
- Y: 0
- Width: lblTotalItems.X/2
- Height: SJPagination.Height
- BorderColor: SJPagination.Fill
- TemplateSize: Self.Width/10
- TemplatePadding: 0
- Items: Sequence(10,1,1) //Will Update Later


- Add a Button and set it's properties as below-
- Name: btnPrevious
- Text: "< prev"
- X: gal_BHG_Pagination.X-Self.Width
- Y: 0
- Width: 80
- Height: SJPagination.Height
- Fill: RGBA(0, 0, 0, 0)
- BorderThickness: 0
- RadiusTopLeft: 0
- RadiusTopRight: Self.RadiusTopLeft
- RadiusBottomLeft: Self.RadiusTopLeft
- RadiusBottomRight: Self.RadiusTopLeft
- DisabledColor: Self.Color
- DisabledFill: Self.Fill
- PressedColor: Self.Color
- PressedFill: Self.Fill
- HoverColor: lblTotalItems.Fill
- HoverFill: Self.Fill
- Add another Button and set properties as below-
- Name: btnNext
- Text: "next >"
- X: gal_BHG_Pagination.X+gal_BHG_Pagination.Width
- Y: 0
- Width: 80
- Height: SJPagination.Height
- Fill: RGBA(0, 0, 0, 0)
- BorderThickness: 0
- RadiusTopLeft: 0
- RadiusTopRight: Self.RadiusTopLeft
- RadiusBottomLeft: Self.RadiusTopLeft
- RadiusBottomRight: Self.RadiusTopLeft
- DisabledColor: Self.Color
- DisabledFill: Self.Fill
- PressedColor: Self.Color
- PressedFill: Self.Fill
- HoverColor: lblTotalItems.Fill
- HoverFill: Self.Fill
- Now, we will add controls in gallery (gal_BHG_Pagination). Click on Edit Template icon and add a button. Set the properties of button as below-
- Name: btnPageNumber
- Text: ThisItem.Value
- X: 0
- Y: 0
- Width: Parent.Width/10
- Height: Parent.TemplateHeight-5
- Color: If(ThisItem.Value=SJPagination.PageNumber,lblTotalItems.Fill,RGBA(255, 255, 255, 1))
- Fill: RGBA(0, 0, 0, 0)
- BorderThickness: 0
- RadiusTopLeft: 0
- RadiusTopRight: Self.RadiusTopLeft
- RadiusBottomLeft: Self.RadiusTopLeft
- RadiusBottomRight: Self.RadiusTopLeft
- DisabledColor: Self.Color
- DisabledFill: Self.Fill
- PressedColor: Self.Color
- PressedFill: Self.Fill
- HoverColor: Self.Color
- HoverFill: lblTotalItems.Fill
- OnSelect: Set(vrSelectedPageNumber,If(ThisItem.Value<=0,1,ThisItem.Value))

- Now add a Rectangle and set below properties-
- Name: rctPageNumberSelected
- X: 0
- Y: btnPageNumber.Y+btnPageNumber.Height
- Width: btnPageNumber.Width
- Height: Parent.TemplateHeight-btnPageNumber.Height
- Fill: If(ThisItem.Value=SJPagination.PageNumber,lblTotalItems.Fill,RGBA(0, 0, 0, 1))

- Our basic preparation has been done. Now, we will focus on actual functionality.
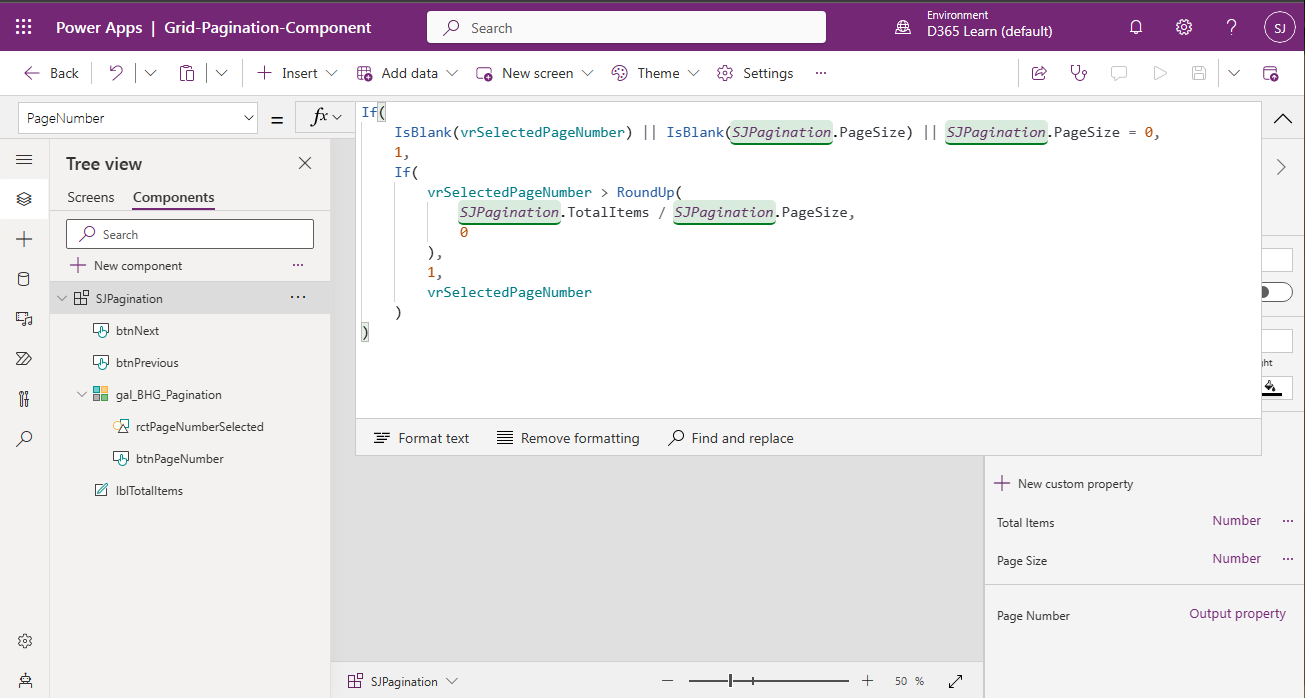
- First, we will set the value of PageNumber property of component. For this, click on component SJPagination and then select the PageNumber property (Output Property). Update the function as-
If(
    IsBlank(vrSelectedPageNumber) || IsBlank(SJPagination.PageSize) || SJPagination.PageSize = 0,
    1,
    If(
        vrSelectedPageNumber > RoundUp(
            SJPagination.TotalItems / SJPagination.PageSize,
            0
        ),
        1,
        vrSelectedPageNumber
    )
)
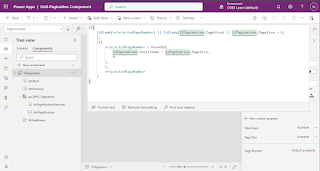
- Basically, it is first validating if vrSelectedPageNumber (currently selected page number) is blank or the PageSize property (Input property) is blank or the PageSize property is 0. If any of the condition is true, then it is setting the PageNumber property as 1 otherwise it is validating if the vrSelectedPageNumber variable value is greater than the total number of pages itself (It needs to be validated in case of filter criteria applied. For example, initially the total number of pages were 25 and the user was currently on page number 24. After applying filter criteria, the number of pages reduced to 13. In such case, there will be no page number 24. Therefore, user must be shown the records of first page). If Yes, then it is again setting the PageSize property as 1 otherwise the vrselectedPageNumber.
- Now, we will update the Items property of gal_BHG_Pagination gallery. Ideally, it's items must change as per the initial, previous, next condition. Means, initially, it must show 1...10. If moving to 11th page, it must show 11...20. Then, in case, moving back to 10th page, it must show 1...10 page. So, click on gal_BHG_Pagination and select the Items property from the dropdown and update the logic as below-
If(
    !IsBlank(SJPagination.TotalItems) && !IsBlank(SJPagination.PageSize) && SJPagination.PageSize > 0,
    If(
        RoundUp(SJPagination.TotalItems / SJPagination.PageSize, 0) > 0,
        If(
            SJPagination.PageNumber > RoundUp(SJPagination.TotalItems / SJPagination.PageSize, 0),
            Sequence(10,1),
            Sequence(
                1 +
                If(
                    SJPagination.PageNumber = RoundUp(SJPagination.TotalItems / SJPagination.PageSize, 0
                    ),
                    SJPagination.PageNumber,
                    If(
                        If(
                            Mod(SJPagination.PageNumber, 10) = 0,
                            RoundDown(SJPagination.PageNumber / 10, 0) * 10 - 9,
                            RoundDown(SJPagination.PageNumber / 10, 0) * 10 + 1
                        ) + 9 <= RoundUp(SJPagination.TotalItems / SJPagination.PageSize, 0),
                        If(
                            Mod(SJPagination.PageNumber, 10) = 0,
                            RoundDown(SJPagination.PageNumber / 10, 0) * 10 - 9,
                            RoundDown(SJPagination.PageNumber / 10, 0) * 10 + 1
                        ) + 9,
                        RoundUp(SJPagination.TotalItems / SJPagination.PageSize, 0)
                    )
                ) - If(
                    Mod(SJPagination.PageNumber, 10) = 0,
                    RoundDown(SJPagination.PageNumber / 10, 0) * 10 - 9,
                    RoundDown(SJPagination.PageNumber / 10, 0) * 10 + 1
                ),
                If(
                    Mod(SJPagination.PageNumber, 10) = 0,
                    RoundDown(SJPagination.PageNumber / 10, 0) * 10 - 9,
                    RoundDown(SJPagination.PageNumber / 10, 0) * 10 + 1
                )
            )
        )
    )
)
- Let's understand this logic. Dividing the logic into colors to explain in better way.
- Color: First check if the current selected page number is greater than the total number of pages. If yes, then create a sequence of 1...10. (However, it will never show the 10 number because the Current Page Number will reset to 1, the moment total number of pages goes beyond the current page number (generally the filter case)).
- Color: We are adding 1 so that when the sequence function will create the page number, it starts with 1, 21, 31 and so on because 30-21 will give 9 while we need 10 number for pagination.
- Color: If the Current page number is equal to the Total number of pages, then use the same otherwise apply the color block.
- Color: This block of code is validating the end number of sequence whether it is less than or equal to the total number of pages. If yes, the use the same otherwise use the total number of page. The reason is that you cannot go beyond the total number of pages. For example if Total Items are 250 and Page Size is 10 the the Total Number of Paes are 25. So the visible pages will be 1-10, 11-20, 21-25. It cannot be 21-30.
- Color: It will give you the start page number of the current sequence (explanation given below for color)
- Color: This piece of code is defining the start number of sequence. It is saying that- If the Current Page number is 10, 20, 30... then the true part will return 1, 11, 21... otherwise false part will return 1, 11, 21... Because if the Current Page number is lying between 1 - 10, then the sequence must start with 1. Similarly, if the Current Page number lying between 11 - 20, then the sequence must start with 11.
- Overall Explanation: The overall objective is to create a sequence of page numbers like 1-10, 11-20, 11-30 and so on until the last page number reaches. If total pages are 40 then the last series will be 31-40. If the total pages are 46 then the last series will be 41-46.

- Now, we will update the OnSelect property of btnPrevious.
If(
    IsBlank(vrSelectedPageNumber),
    Set(vrSelectedPageNumber, 1),
    If(
        vrSelectedPageNumber > 1,
        Set(vrSelectedPageNumber, Value(vrSelectedPageNumber) - 1)
    )
)

- Similarly, update the OnSelect property of btnNext.
If(
    !IsBlank(SJPagination.PageSize) && SJPagination.PageSize > 0,
    If(
        SJPagination.PageNumber < RoundUp(
            SJPagination.TotalItems / SJPagination.PageSize,
            0
        ),
        Set(
            vrSelectedPageNumber,
            SJPagination.PageNumber
        );
        Set(
            vrSelectedPageNumber,
            vrSelectedPageNumber + 1
        );
    )
)

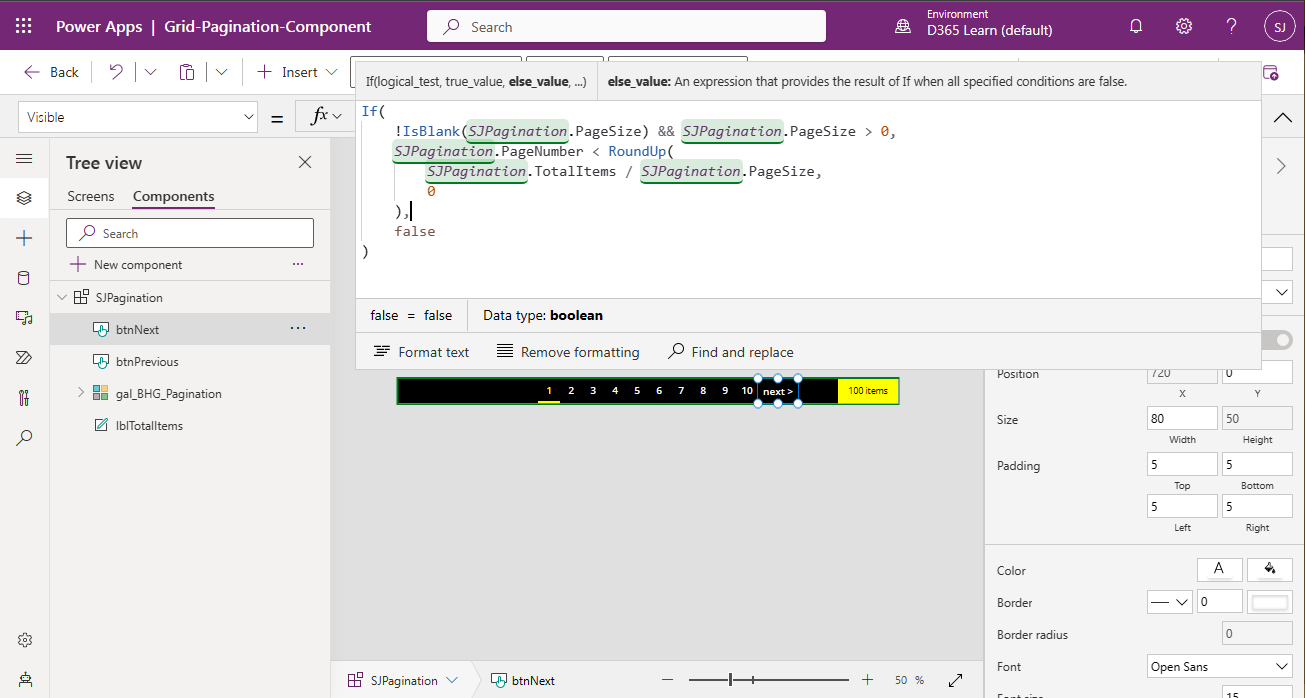
- Now, the Previous button must be visible only if PageNumber is greater than 1. Similarly, the Next button must be visible if the PageNumber is less than the Total Number of Pages.
- Update the Visible property of btnPrevious-
- SJPagination.PageNumber > 1

- Update the Visible property of btnNext-
If(
    !IsBlank(SJPagination.PageSize) && SJPagination.PageSize > 0,
    SJPagination.PageNumber < RoundUp(
        SJPagination.TotalItems / SJPagination.PageSize,
        0
    ),
    false
)

- That's all. Now, go to screen tab, add a gallery add few buttons and create collection of different row counts on these buttons. Assign this collection to Items property of gallery. Add the pagination component. Set TotalItems property to rowcount of collection. Set PageSize as 10. Now play the app and test multiple scenarios.
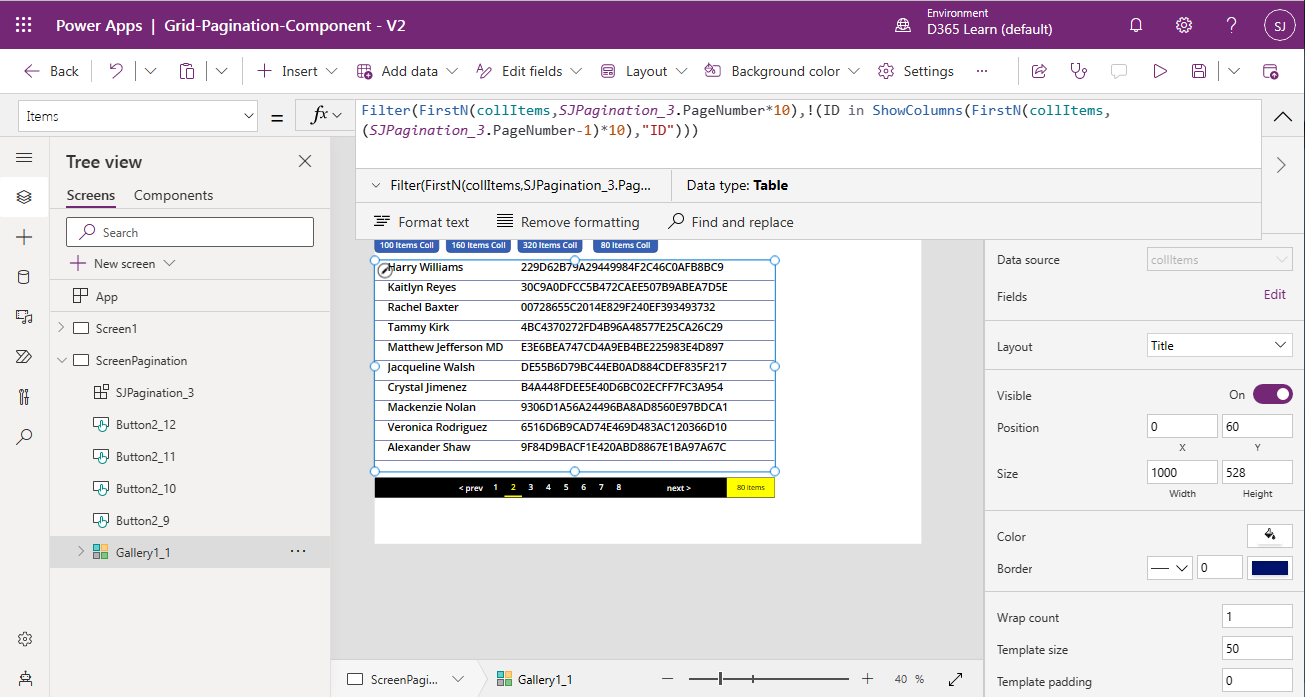
- (Added Apr 01, 2023) The Items property of the gallery should be set as-
Filter(FirstN(collItems,SJPagination_3.PageNumber*10),!(ID in ShowColumns(FirstN(collItems,(SJPagination_3.PageNumber-1)*10),"ID")))

- (Added May 22, 2023) Another fast response way to implement the Items property is -
If(
    SJPagination_3.PageSize * SJPagination_3.PageNumber <= CountRows(collItems)
    ,LastN(FirstN(collItems, SJPagination_3.PageSize * SJPagination_3.PageNumber), SJPagination_3.PageSize * 1)
    ,LastN(FirstN(collItems, SJPagination_3.PageSize * SJPagination_3.PageNumber), (CountRows(collItems) - SJPagination_3.PageSize * (SJPagination_3.PageNumber - 1)))
)

- Any of the Items property can be chosen. However, I would prefer the later one as it was found to be more effective, and fast as compared to former one in case of bulk data.
- Clicked on 80 Items Coll button.

- Clicked on Page No 2.

- Clicked on last page number (8).

- Clicked on 160 Items Coll button.

- Moved to last page of the new collection.

- Clicked the 80 Items Coll button again. As the current page number (16) was greater than the total number of pages (8) of new collection. The selected page number resets to 1.

- This is how, you can create pagination component. Now, using the output property of component "PageNumber", you can reload the collection by applying filter on datasource. Ideally, your master collection will be the separate one. From that master collection, you have to filter the desired number of items into a child collection and that child collection will be passed to the gallery items property. The pagination component's TotalItems property will be set basis upon master collection.
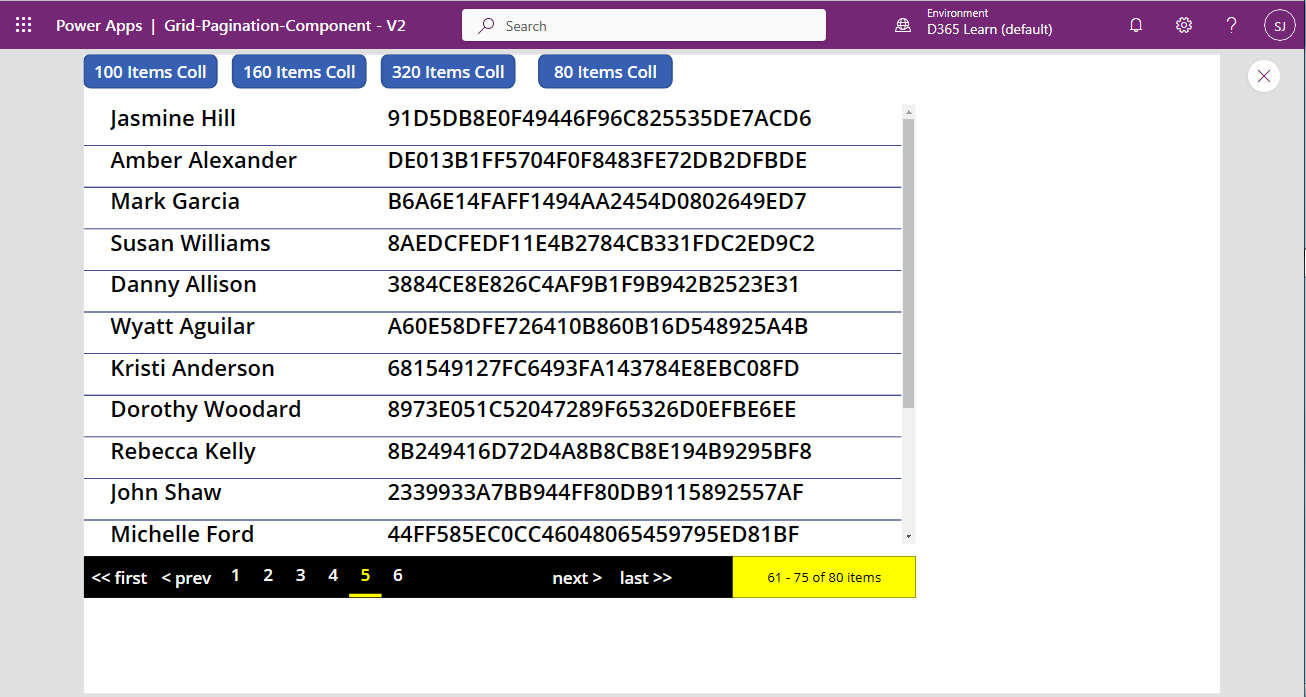
- If you wish to show the TotalItems like "1 - 10 of 80 items", then you need to make couple of changes-
- Add 2 buttons-
- Name: btnFirst (Copy of btnPrevious)
- Text: << first
- X: 0
- Width: 85
- OnSelect: Set(vrSelectedPageNumber, 1)
- Name: btnLast (Copy of btnNext)
- Text: last >>
- X: btnNext.X+btnNext.Width
- Width: 85
- OnSelect: Set(vrSelectedPageNumber,RoundUp(SJPagination.TotalItems / SJPagination.PageSize,0))
- Also, you need to update few properties of existing controls-
- btnPrevious.X: btnFirst.X + btnFirst.Width
- gal_BHG_Pagination: btnPrevious.X + btnPrevious.Width
- Also, you need to add 2 input properties in component-
- Name: FromItemNumber / DataType: Number / Default Value: 0
- Name: ToItemNumber / DataType: Number / Default Value: 0
- Then you need to update the lblTotalItems controls as-
- Text: If(
    SJPagination.TotalItems > 0
    ,SJPagination.FromItemNumber & " - " & SJPagination.ToItemNumber & " of " & SJPagination.TotalItems & " item" & If(SJPagination.TotalItems > 1, "s")
    ,"0 items"
)
- Width: 220
- Size: 12 (Font size)
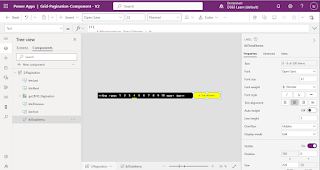
- Coming back to Screen, where the component is used, we have to give input values to the 2 input parameters we had created.
- FromItemNumber : If(CountRows(collItems) > 0, ((SJPagination_3.PageNumber - 1)* SJPagination_3.PageSize + 1), 0)

- ToItemNumber : (((SJPagination_3.PageNumber - 1) * SJPagination_3.PageSize) + Gallery1_1.AllItemsCount)

- Save the app and play-
- Default-

- Next-

- Last-

- Previous-
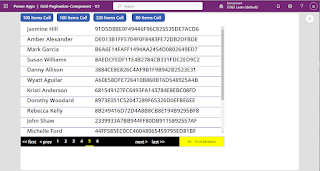
- First-

- In case, if you wish to provide Page Size option as well, then you need to add a dropdown and wherever we have used 10 as static value for PageSize, use the selected value of dropdown. Also change the type of PageSize property from Input to Output.







With this, I am concluding this post.
Happy Coding !!!
Will see you again with some new topics.
Stay Safe !
Stay Healthy !